
I've just finished translating the little pamphlet that comes with the Etegami starter kit, and though it doesn't say anything that I haven't said a million times on this blog, I thought it would be good to post it anyway. I have chosen to depart from traditional methods in some of my recent etegami, but that is only after being steeped in the traditional methods for so long it has become a natural part of me. From those roots I occasionally venture into new territory. For the beginner etegami artist, I recommend digesting the concepts in this pamphlet to get started on a solid foundation.
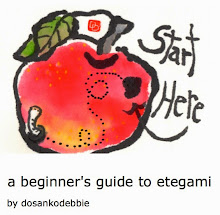
“An Invitation to Etegami”
(English translation and explanatory notes by Deborah Davidson, c 2012)
(1) The motto of Etegami is “It’s fine to be clumsy. It’s good to be clumsy.” What matters is whether or not you have put your heart into your painting, not whether the painting is a fine work of art. Your earnestness communicates to the person who receives the card, and touches his heart. Each etegami should express something of the character of the person who painted it.
(2) Etegami is a one-shot deal; there is no underdrawing or practicing on another piece of paper before doing the actual painting. Every time you paint an etegami, you are, so to speak, “broadcasting live.” There is no concept of a “failed” or “ruined” etegami. Every etegami you paint should be placed in the mail box and sent on its way to someone else.
(3) Unlike many other forms of traditional Japanese art, there is no “model” etegami painted by a master for you to imitate. The flowers and vegetables created by the hand of God are your best “models.” Observe these models closely before you begin to paint them.
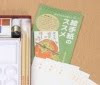
ETEGAMI TOOLS
[Look at the photo in the pamphlet]
(1) The blank washi cards used in Etegami are called Gasenshi. They have various qualities like “bleed” that help produce much more interesting paintings than the ordinary blank postcards sold at the post office.
(2) The ink stone is the same as used in Japanese calligraphy. You rub the sumi ink block against this stone to dissolve it with enough water to produce the thickness you seek. [Note: the starter kit has a little plastic bottle of liquid sumi ink instead of an ink block and ink stone]
(3) Blue sumi ink block. The ink block used for Etegami is more of a blue-black hue than the ink used in calligraphy. [In the starter kit, liquid sumi developed especially for etegami use substitutes for the ink block. Pour a little of this concentrated ink into a small screw-top jar or bottle and thin it to your desired thickness. That way, any unused ink can be saved for another session.]
(4) Coloring brush-- this is a natural fiber coloring brush that you will use only for placing colored paint on your etegami. [I have marked the correct brush pen in your kit with a “C”]
(5) Line drawing brush-- this is a natural fiber line-drawing brush that you will use only for painting the outline of your image with sumi ink. [I have marked the correct brush with an “L”]
(6) Water dish. [The starter kit doesn’t have a water dish, but you may want to use the large square indentation at the top of the plastic palette for water. Or use a small glass or plastic jar instead. Dip your brush into this water for dabbing at your color blocks and for thinning the colors to the intensity you desire, and for washing off one color before using another. I use two glass jars. One for thinning colors, and the other for cleaning my brush between colors.]
(7) Plum dish. A ceramic dish you use for adjusting the intensity of your colors. Used like a palette. [in your starter kit, the plastic palette replaces the plum dish.]
(8) Gansai paints. [Gansai is the form of water-soluble paint used in traditional Japanese art. It is made from natural minerals and works better with washi paper than western watercolors. There are some subtle differences between gansai and watercolors that will become apparent to you as you get experience. Gansai colors tend to look muddy when they are laid over one another, so please avoid this. They can, however, be laid next to a different color for interesting effect. Rather than mixing different gansai colors together in your palette, adjust intensity and tone of colors with judicious use of water.]
(9) Vermillion paste for inking name seals (chop). This is the red-orange paste in which you ink your name stamp (chop) before using it to sign your etegami. [Nowadays there are convenient stamp pads of this same hue of viscous ink to use with name stamps. If you can’t get such a stamp pad, or if you do not have a chop, draw a symbol for your name with a red-ink pen instead.]
CORRECT POSTURE
In order to draw images and words that reflect your “you-ness,” what you need is the ability to focus. If you hold your ink brush the way you hold a pencil, you will not be able to focus. Rather, by purposely holding the ink brush in a way that makes it difficult to control, you will be able to draw without the mind-clutter that urges you to “draw well.”
(1) Hold your ink brush lightly at the very top of the shaft.
(2) Raise your elbow, relax your fingers, arm, and shoulders.
(3) Practice making lines, spirals, and letters on a piece of thin washi (like which is used for calligraphy). Move the brush as slowly as physically possible. [Enjoy the bumps and blotches that come from your shaking arm, your beating heart, and the friction of the brush against the paper.]
TIME TO DRAW!
(1) Choose your subject
In Etegami, anything that is part of your daily life can be your subject. If this is your first attempt at making etegami, choose something with an easy shape to draw, Vegetables and fruits are a good choice.
• Closely observe one subject.
•Start with some aspect of the subject that catches your eyes. Draw as slowly as you can, with as thin a line as you can make.
•If you draw boldly from the beginning, you can better assure that your subject will appear big and bold. Let the edges of your subject escape the boundaries of your card. [It is best if you don’t stop your ink brush at the edge of the card, but actually continue to make your line off the card. For this, you want to make sure that you have a large piece of paper or newspaper spread out under your card when you paint.]
(3) Now add color
Place your color with your coloring brush quickly and rhythmically inside the border of your image. Tap the colors softly against the card as though you were tapping a drum. If you try to mix and overlap many colors, the colors will appear muddy. Your purpose is not to make a photographically accurate image of your subject. Using bright-ish colors will result in an attractive etegami.
(4) Now add words
Your words should be easy to read. Don’t try to use de-formed letters or connected letters [this applies to Japanese letters.] It’s best to use block letters. Make the horizontal lines parallel to one another, and maintain a balanced distance between them. [again, this applies mainly to Japanese letters.]
Chose words that you would normally use. Think of the person you plan to send the card to, and write as though you were having a conversation with him/her. This should make it easier to find the words to write.
If you have a name chop and the traditional vermillion-colored paste or stamp pad to use it with, press your chop in an open space that feels balanced to you. This will pull the whole etegami together and make it feel complete. Name chops are easy to carve with a craft knife from rubber erasers. Otherwise, draw your initials or a symbol of your name with red ink.
(6) When your etegami is finished, address the front (non-image) side of the card, put a postage stamp on it, and stick it in the mail box!
USE SUMI INK AND INK BRUSHES
[Although you are free to use tools that are most convenient for you,] nothing beats the warmth of an image drawn with sumi ink applied by an ink brush. Lines drawn with an ink brush will bleed and wobble, getting thicker and thinner in places, as though your very thoughts and feelings communicated to the paper through the ink brush. Don’t be afraid of using sumi and ink brushes.
USE GASENSHI CARDS
[Gasenshi are washi postcards for Etegami use] They have many properties-- such as “bleed” and “scrape” and a particular responsiveness to gansai paints-- that make Etegami so interesting. Unexpected and unplanned “imperfections” are what make Etegami appear so alive and warm.
HINTS FOR KEEPING YOUR PASSION FOR ETEGAMI ALIVE
◆Keep your etegami equipment close at hand (preferably all together in a box or bag) so that you can draw whenever you get in the mood.
◆Get into the habit of drawing one a day, for a little as 30 minutes each time, the same way you might keep a diary.
◆Find people who look forward to receiving your etegami. In the beginning this may be your parents, children, or close neighbors. Having someone who looks forward to your etegami will encourage you to keep painting them.
◆Find things you like to paint. If you chose a theme, something that interests you, you will be motivated and it will be easier to maintain the pleasure of painting.
CHILDREN LOVE ETEGAMI
Age has nothing to do with etegami. Etegami is a great way for children to stay in touch with grandparents who live far away, or who have fathers living away from home for some reason. Sending and receiving etegami between family members is a lot of fun. Why not give it a try?


This is lovely and encouraging and accepting of the beginner like me. I have a better understanding of how etegami functions now. Thank you for this. It seems like such a deeply personal and freely creative art form. Full of delight and wonder and oneself.
ReplyDeleteThis is what I was waiting for. I'm teaching watercolour for kids. Sometimes we do, Etegami, but I couldn't explain about Etegami very well in English.So this is really useful. Thank you.
ReplyDeleteFascinating-- I never knew all the rules & techniques although I certainly appreciate the results! I'm going to have to try playing with holding a brush like that, although I don't have all the proper gear... I still think it will be a valuable exercise, so very different from my usual miniature-influenced approach.
ReplyDeleteI can't wait to get my kit and try one! Great instructions my friend!
ReplyDeleteuseful instructions, thanks!
ReplyDeleteThis sounds like something I need - both ways. Thanks for posting it.
ReplyDelete